The Final One… YAAAAAAAAS

So. Last part of my learning project.

I wanted to incorporate elements of both pendants I made before, which makes it difficult, because working with silver is difficult when you don’t have proper casting tools.

When you need to work precisely with silver? Forget about it.

That being said, it was design-wise that these incorperations were made. Still though, let’s do a little recap of what’s been done thus far:

First, I made two pendants out of maple wood, and stained them darker. I used lamb leather as a cord, and tied slipknots in them for readjustment of size. One pendant was arrowhead shaped, and the other…was…coffin shaped? I guess?efcsga2

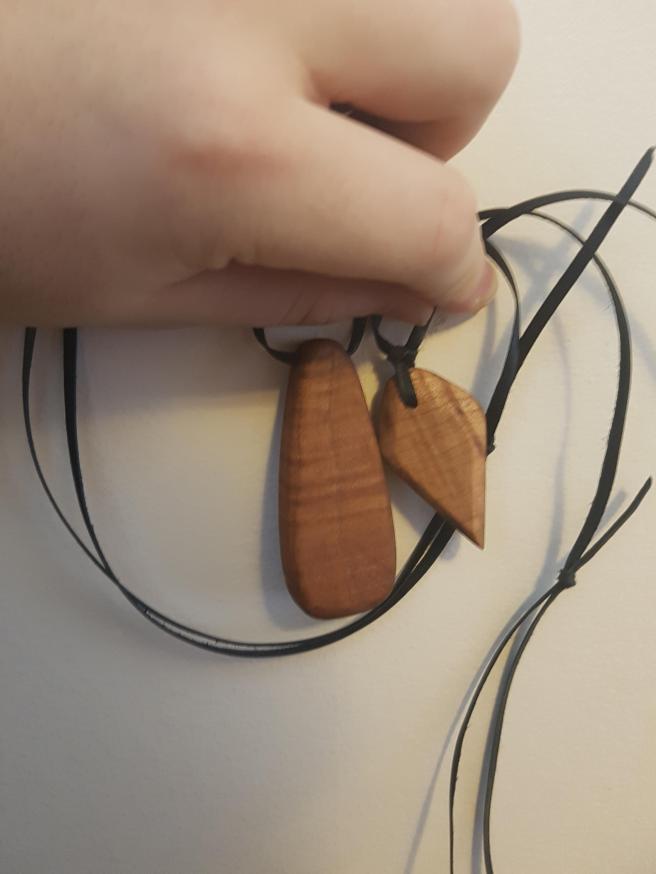
So. I like how they turned out – the arrowhead one in particular.

Next was my least favorite part. The silver one. And while it’s definitely the most fun to work with, it’s also definitely the most unforgiving.

I cut out a rough shape in wood in order to cast the silver, melting it in a crucible with propane torches. I used the same lamb leather cord with a slipknot that I used for the previous necklaces.

20170404_211457

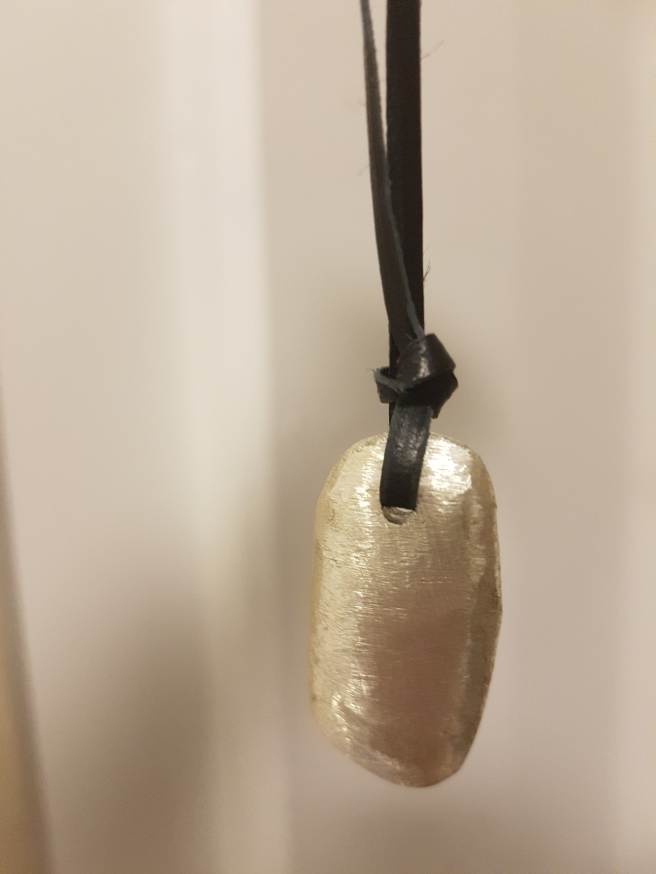
While it’s not terrible, it most definitely could have turned out better. But I digress – onto the fourth and final pendant:

For this one, I wanted to use a darker wood in order to better contrast the bright silver (colour combinations, yo).

My wood of choice was black walnut. A nice, dark colour, it stains brilliantly and is easy to work with. It’s also fairly durable. This is a colour comparison between black walnut and maple.board comparison

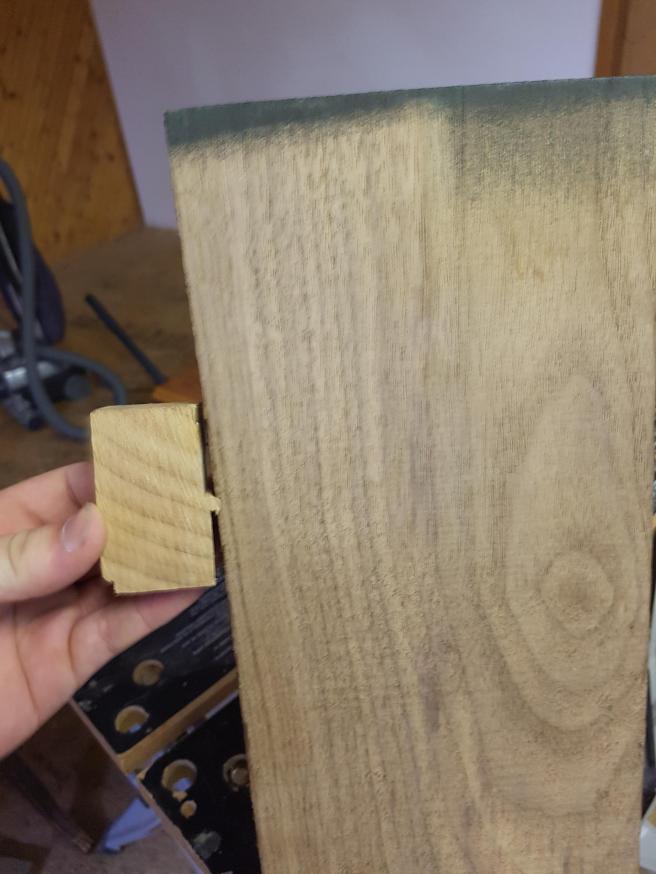
It’s sorta cool that you can tell how old the wood is based on the age rings. Those round streaks through the wood – the more of them there are, the older the wood is. Based on that, the black walnut is far older, because the rings are so much closer together.

So what I needed to do was cut this down to a rough shape. Unsure of what I wanted my final product to look like, I just started cutting and waited to see where it took me.rough cut

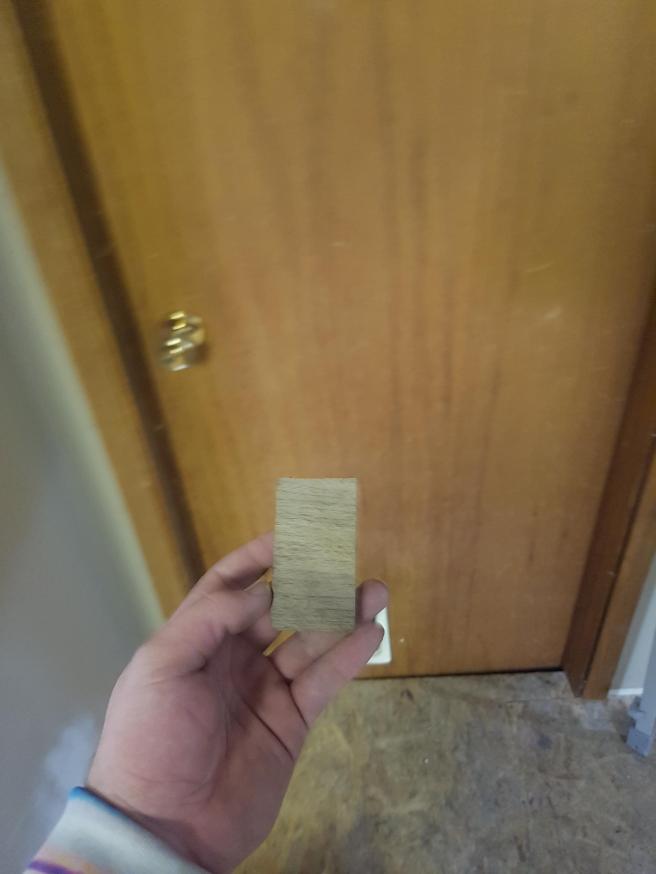
A rectangle. That’s where it took me. Good job, me ^_^

Anyways, next was sanding. As usual, this was both the longest and most annoying part of the whole ordeal.

Regardless, a few hours later, I emerged from my garage triumphant, holding aloft a wonderful piece of sanded wood.sanded

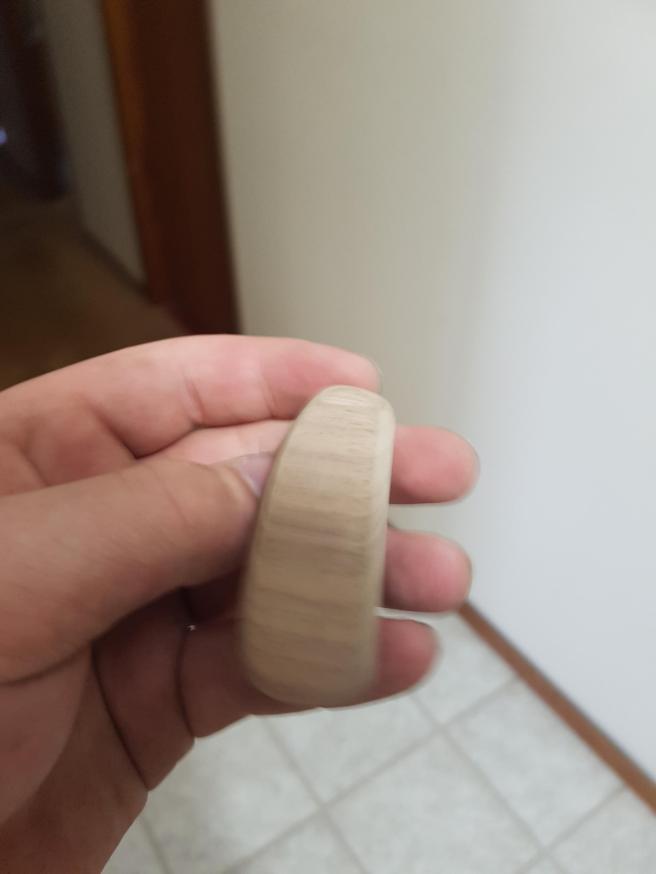
So you remember the next step. Drilling! Yaaaaay!

…except my uncle took our drill to work on stuff. How. Rude.

So my dad decided to be amazing – he took one of his father’s old handheld drills. This thing was actually crazy. seriously this drill tho

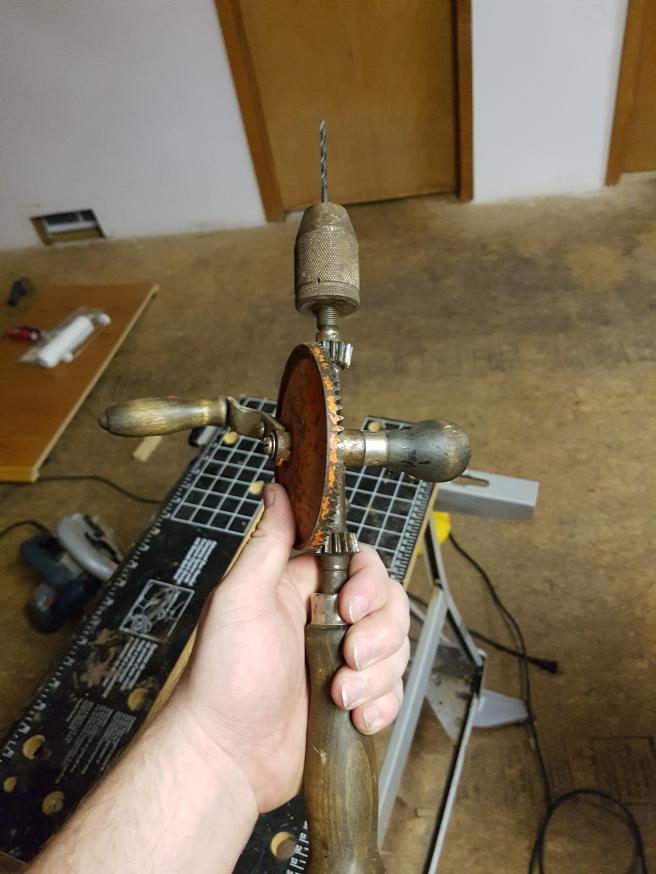
Crazy drill in hand, I bore a hole straight through the wood. It turned out very nicely. Looks like the old drill still has it ^_^drilled

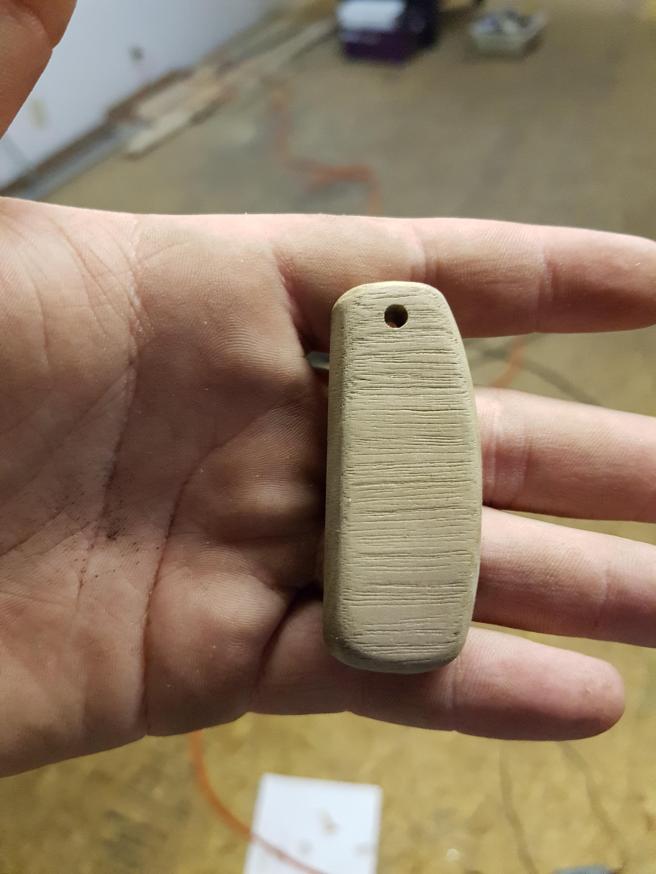
So. My next mission, as you may well remember, is staining the wood to give it a richer colour.

I knew black walnut was a wood meant to take on a nice and rich dark colour, so I used the same stain that I used on the maple.

The result was… satisfying. Of course, I had to hang it up to dry before I could really appreciate the final product.stained & hanging

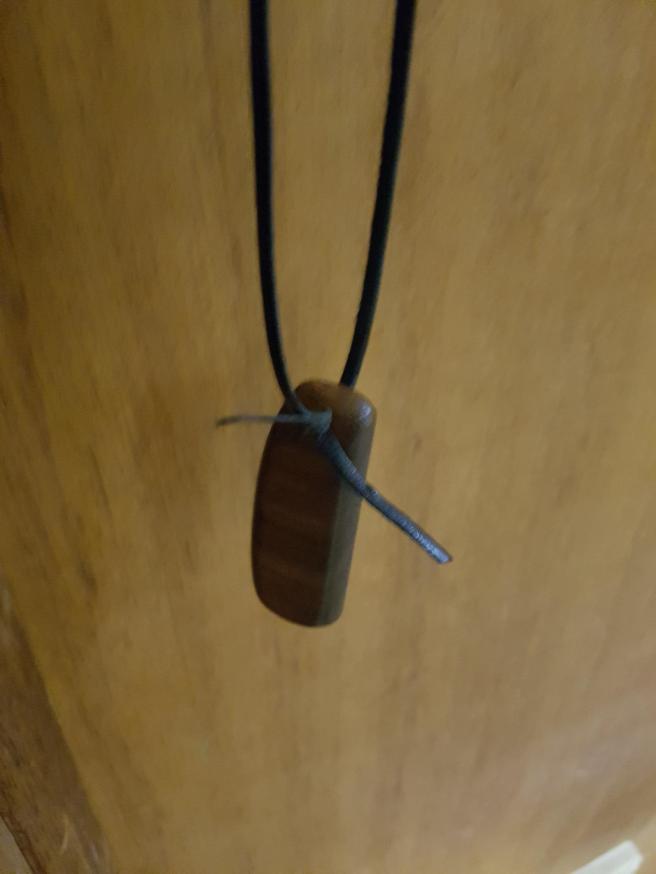
Now comes the tricky part. See, as I said before, I’m really incapable of doing complex things with silver without spending an exuberant amount of money. Thusly, I decided to take the wooden part to the hands of a jewelry store, and they put a ring on it. I guess they were fans of Beyonce.

In addition to putting on a ring, they also gave me a metal cord to hang it through, in order to properly get the colour contrast right. All-in-all, while I’m sad I didn’t get to do it myself, I’m quite pleased with the results.

So…yeah. Final product.

I’m pleased with the result, like I said. Black walnut stains to a gorgeous colour, and it looks good contrasted with the silver.

I’ve enjoyed being able to screw around with jewelry and sorta shape things to how I see fit. I like the creative freedom of that. I think that’s why I liked working with the wood as opposed to silver: you have more freedom, since it’s easier to work with.

That said – as always, open to any criticisms. Love you all – have a great summer break ^_^

Stage 2 of 3 – The plot thickens. As does the material.

SO. Here we are for the second time around. Next weekend this is gonna culminate in a giant explosive ball of awesomeness. Or it’ll suck. Who knows?

My first attempt at jewelry went fairly well, if I do say so. You can check that out here, if you feel so inclined.

But anyways, for my second attempt at making a piece, I decided to make use of silver as my material rather than wood. Since this is just a start, I largely wanted to make something similar to what I did in the first place, with wood. Just a nice, simple piece, hung by a leather cord, with a knot tied to make the cord and pendant parallel.

I went about this by using a small kiln, with two propane torches on the sides. It was a kit I ordered off of Amazon. It served me quite well, all things considered.

Starting off this magical journey of melting metal, as well as ordering the kiln, I ordered some casting silver. Essentially, it’s tiny little balls of silver, hence where it gets the name “grain”. So I had the material and the way to melt it. So, how was I going to be able to cast it?

See, that’s where this gets a little silly. Based on general research (specifically this video here), I figured that I’d be able to use wood as a mold. To be honest, however, I really didn’t have a ton of options for being able to cut, glue, carve, etc. So what I ended up doing was taking a dremel tool and cutting out a shape for the silver to mold to. It, ah, was a rather crude way of doing things, but I didn’t exactly have a lot of options.


So, after polishing things up, making sure the mold was decent, I went for it. Silver liquefies at 961.8 °C, so I had to leave it in the kiln for a while. You can see here – the grain is still in a fully solid form, and the crucible is still it’s native black colour.in the kiln

So. You gotta leave it, right? I stood by, idly watching away, growing older and older by the minute. Of course, it didn’t actually take that long to melt – I just hate waiting. After giving it around 10 minutes in direct heat, I decided to give pouring it a go.


Thanks again Dad for the stellar camerawork, and for making fun of me for my pouring skills. Personally, I just think he’s jealous. Not many could pour with the deftness that I possess. Or something like that, anyways.

So the silver… actually turned out not too bad. The wood, unfortunately, suffered a darker fate, being burnt beyond repair. The sacrifices it made shall not be in vain. So – my fallen wooden comrade not forgotten, I turned my attention to the silver itself. Like I said – it turned out not too bad.

So – my fallen wooden comrade not forgotten, I turned my attention to the silver itself. Like I said – it turned out not too bad.


RIP woodfresh out the cast


It’s a fairly good piece of metal. The flaky bits on the top of it are the melted slag from the silver. All they required was some grinding. And cooling. That silver was HOT.

The process was arduous and long. From burning my hands sanding it (yes, through gloves) all the way to drilling a hole through it for the cord, it sure took a long time. Whaddya know, silver is harder to sand than wood. Go figure.

But yeah. The finished product, with and without the cord:

20170404_211457complete


All in all? I’m…okay with how this turned out. Yeah, there was no shortage of effort put into it, but I feel like when I work with wood, I’m able to mold it more how I want. Metal is pretty unforgiving in that aspect.

So, that said, next weekend, I’ll be finishing this up. Not this pendant – it’s done – I mean, the final project I’ll do. Since I tend to gravitate towards pendants, and seeing as how I’ve done wood and silver thus far, I’m thinking a combination would be cool. A main body of good, decorated with silver. That said, any thoughts are welcome. Have a good day, and thanks for reading ^_^


Omg he actually did something

And by did something, I of course mean my learning project.

Now, I went into this process with one video at my back, but at the same time, I only really watched the video to help with the mental process. I didn’t want to go into this not knowing anything of what I was doing. While I have worked with wood before, I’ve never worked on anything small and delicate. The last thing I made was a table.

And, yes, I have the silver, but I didn’t have the necessary tools to safely melt and cast it. I could have winged it, but messing around with 961.8 °C molten silver unsafely didn’t sound like a lot of fun. To me, at least.

That said, let’s get into what I used. If you don’t care about the process and just want to see the end result (and judge me harshly), that’ll be at the bottom of the post.

Materials:

Maple wood – it’s inexpensive, fairly hard and durable, and makes for a great color.

Calf leather – I bought this already in the form of a cord. Leather-working is cool, but it’s not something I’m really willing to do. I chose calf leather because it’s very durable for the size.

Danish Oil-brand Golden Oak stain – I chose this particular stain because A: the color was lighter, and I wanted contrast from the black cord. B: As far as I know, oil penetrates the wood more than a gel, so it would result in a more even color.

Tools:

Clamping table – I used one similar to this table, albeit a lot less fancy. Was used in lieu of C-clamps.

Jigsaw – I preferred this saw over a circular saw because I was able to make far more precise cuts into the wood.

Circular saw – I did use this for the initial cuts through the wood, since the blocks were so large. This dealt with that a bit easier.

Wheel sander – I was a bit limited in sanding options, but luckily my dad had this old one in the shed. I think it ended up working out pretty well.

Hand sander – Just a simple sponge hand sander in order to smooth out the piece and buff out any burn marks.

The Journey:

Ooooh boy. This one took a little learning.

(I apologize in advance – my camera on my phone is a bit wonky sometimes, so some pictures will be bad quality.)

So, first off, I took a chunk of wood. This was the chunk of maple I had to work with.

d5xsrrcp3fsxk6

Neat, huh? So my next step was obviously cutting it down to size a bit.

Next, I didn’t want to be sanding until this semester was already over, so I cut this piece down some more, and then wedged a chunk of it in between two other pieces in order to cut it, thickness-wise. (Ignore the burn marks from the saw – it’s been a while)

khji4biks32abj

After getting a sizable piece, I began to work on it, with lines to help guide me towards the end product. I had already tried this without using lines. The result was…not good. At first it was looking like a human head, and then a teardrop. I think it was mimicking my emotions. /s

esog2ldfklfvrg

So yeah. That one was a failure. However, as seen above, I had two pieces of wood to work with. And work with them I did. The second one I tried turned out a lot better out of the sander, with the only kerfuffle in my plans being that the sander left quite a few burn marks.

So I had to sand it with a hand sander. Honestly it wasn’t that bad – since the pendant was so simple in design to begin with, sanding wasn’t that much trouble for me. After sanding it – and once I was satisfied with where I had gotten it – I drilled a hole through the side. The design permitted me to do that, and it made putting a cord on it monumentally easier.

cmbnxufrgyivo0

So, after drilling the hole, the final step was needed. Staining. I needed to stain it. So, I did! :D! After staining, I hung it on some…metal twine? Just something that could fit through the hole that wasn’t the actual cord. I’m not sure how well a stain would show on black leather, but I didn’t want to take any chances.

xuf9brx9ow20k3

I should mention – I woke up the next day and figured – I really think I can do better. The pendant had turned out fairly well, I’d like to say, but I figured I could do a lot better. So I made another. …and completely forgot to document the progress. This is a good and bad thing, however. I mean yes, it was the point to document it, but the reason I forgot to was because I was so engrossed and focused on completing another pendant. When I remembered to take some pictures, I had already finished it.

eoyzyf6

My general inspiration for the second pendant was that I just wanted to make a more intricately designed work than the first. Who knew that making wood intricate took more work. And by work, I of course mean sanding. Yaaaaaaaaaaaaaay sanding.

While I hung the second to dry, I figured I’d do a little experiment. I stained the first one twice, trying to look for any color difference. There was some – just not much.

So, having completed the actual pendants, I needed to do some work with the cord. Using black calf leather, I tied slipknots through both of them. I like the aesthetic of the slip knots, and being able to adjust the necklaces at will gives them a more dynamic feel. It was either that, or do one of two things: either make it big enough to fit over your head (which would look dumb with the designs I used), or retie the necklace every time you wanted to take it on or off. Yeah no. Not doing that.

6v8vcyda0nq682

An interesting note – you might have noticed that the hole drilled through the second pendant is straight through. This is because I didn’t trust the drill not to split the wood if I tried to drill through a side so thin. Plus, the sturdiness wouldn’t be there with such small parts holding it on. So I tied a basic…uh, knot? I don’t know what it’s called – my mom showed me how to do it. It’s basically just a knot that turns the cord 90°, allowing the pendant to remain parallel to the cord.

6zylirg5lgp25d

Overall, I’m really freaking happy with the results. I think they look pretty good.

Of course, I’m not closed to other opinions. If you have any ideas for what I could do with wood in the future, let me know!

…but don’t tell me that I used the wrong tools. They were all I had. Nerd.

efcsga2

Ideas? I love ideas! YAY!

Alone and fruitless

I check YouTube for more thoughts

And I find some gold


How’d you like that? Hmmm? Hmmmmm? Hmmmmmmmmmmmmmmmmmmm?

But you’re not here for my amazing haiku skills – nono. You’re here about

STORM. WHERE’S THE JEWELRY. YOU SAID YOU’D BE FABULOUS. I’M WAITIIIIING.

Fine, fine, jeez. I’ll give you another update on what I’ve been doing. Strangely enough, the haiku I led with actually alluded to what I’ve been doing. I have the idea planned out for the necklace made of silver – that has already been said. However, I figured I needed some more progress here. So I thought – why just limit myself to metal? Let’s make a pendant out of wood, too!

So began the search on YouTube. Fortunately, I found an awesome video pretty quick. In the video, to summarize, Dudebro (yes, that is my name for him) makes wooden pendants with fairly little equipment. A sander, a drill, some carving tools, and a band saw. This appealed to me since, while I do have a good interest in woodworking (not due to skill – I just like it) I don’t have much equipment. So this was perfect for me.

I love both the look and simplicity. Perhaps I’ll try to throw in an overlay, in an effort to make it more personalized, but don’t count on it. I might not have the time, but if I do, I’ll definitely see what I’m able to throw out. Either this weekend or next – I’m excited.

B r u h. What’s up? -update

So, you mind be wondering what’s going on with my personal learning project, given the lack of updates. WELL FEAR NO LONGER, MY FRIENDS! For I, the great and wonderful Storm, am here to giveth you much-needed information!

Basically, I’ve ordered metal to be shipped and it hasn’t gotten here yet. That’s basically it. In order to make up for the lack of posts, however, I’m planning on making multiple articles of jewelry (metal or otherwise) next weekend, where the metal should (SHOULD) be here. If it’s not, I really don’t know what to say. I’ll update further at that point.

So yeah, this is really it. Just a quick little update to let y’all know where my jewelry-making adventure stands. I’ve got some great plans. Now I just need the materials. A full video on the process will follow, explaining what exactly I’ve done. (Fear the jewelry. mwah. hah. HAWHAW!)

The beginning. Mwa. Ha. Haaa.

ECMP355. A wonderful place. Full of the dreams of children, and adored by many.

…wait, that’s Disneyland. I’m thinking of Disneyland.


While ECMP355 might not be Disneyland, it’s certainly there in it’s own right. And I plan to make the most of it.

Beginning – I have an important thing to do. That important thing? Well, besides be a decent human being – it’s choose a personal learning project! My choice of progress is unimportant, so what have I, in my truly infinite wisdom, decided? I’m going to learn how to make jewelry.

Now while I’m sure my terrifying masculinity (clearly expressed with that last sentence) might scare away some who aren’t all about those sweet gainz, hear me out here.

Have you ever been in a situation where you’re reminiscing about something, and you think to yourself: “I wanna experience that again!”. It could be anything, really. Food, jewelry, a video game. However, memory has a way of romanticizing things that we haven’t experienced in a while. That’s why nostalgia is always looked at with immense fondness.

I’m tired of remembering that a ring or necklace looked one way, and then finding the exact one that I thought I remembered exactly, and having myself proven wrong. What I want to do is to make my own jewelry, the way my mind’s eye envisioned it. It may be wrong, but I’m going to make it right.

My first step is going to be based off of the same process as this YouTube video by user carsandwater. I’m going to melt down silver and cast it in wood. However, my plan is to extend on what has been done in the video. The goal of making my own jewelry, after all, is to imprint myself unto what I am doing. Therefore, it would be pointless to simply copy somebody else’s work. Their methods, however, are free reign.

The actual modifications I’m going to be doing to the result in the video (which, TL;DW: is just a 1 oz. silver ingot) will be shown when I actually have it done. Until then, hope you all have a great time, and here’s hoping I don’t burn my everything off. ❤